top of page
Services
Industries
Testimonials
Partners
Contact
About
How to Videos
Blog
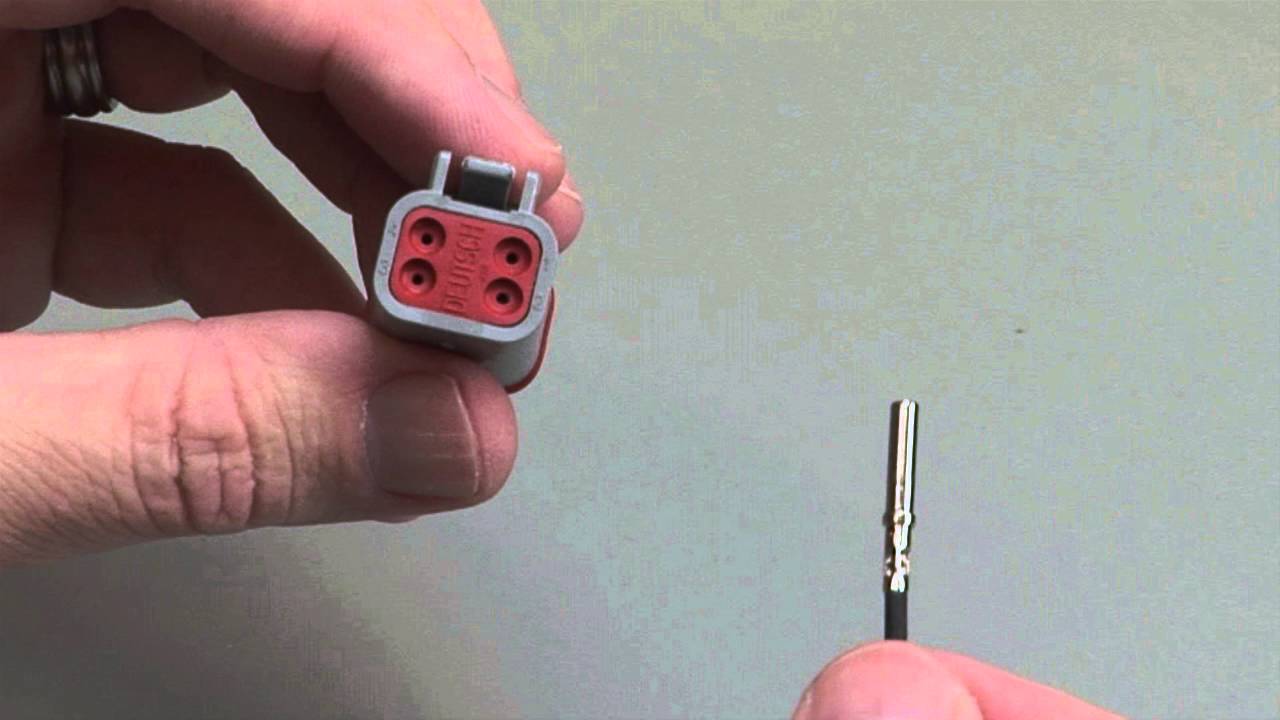
Deutsch, Series DRC
Play Video
Play Video
02:01
Deutsch DRC Connectors - Overview
The environmentally sealed DRC Series is a rectangular connector series that offers insert arrangements of 24, 40, 50, 60, 64, 70, 76, and 80 cavities and accept size 12, 16, and 20 contacts. Many mounting options are available including in-line, flange mount, and PCB mount. Available online, supplied worldwide and delivered to your door step. Link to the DRC Series is below: https://www.deutschconnectors.com.au/deutsch-connectors/deutsch-drc-series-connectors.html
Play Video
Play Video
03:09
DEUTSCH DRC Series Connector Instructions
♣This video provides step-by-step instructions on how to properly insert and remove contacts when using TE Connectivity's DEUTSCH DRC Series connectors. Visit http://www.te.com/ict for more information. DRC Series Contact Insertion Step 1: Grasp contact approximately one inch behind the contact crimp barrel. Step 2: Hold the connector with the rear grommet facing you. Step 3: Push contact straight into connector until a positive stop is felt. A slight tug will confirm that it is properly locked in place. DRC Series Contact Removal Step 1: With rear grommet facing you, snap the appropriate size removal tool over the wire of contact to be removed. Step 2: Slide tool along wire into the insert cavity until it engages contact and resistance is felt. Step 3: Pull the contact-wire assembly out of connector.
Deutsch, Series DT
Play Video
Play Video
04:18
DEUTSCH DT Series Connector Instructions
This video provides step-by-step instructions on how to properly insert and remove contacts when using TE Connectivity's DEUTSCH DT Series Connectors. Visit http://www.te.com/ict for more information. DT Series Contact Insertion Step 1: Grasp crimped contact approximately one inch behind the contact barrel. Step 2: Hold connector with rear grommet facing you. Step 3: Push contact straight into connector grommet until a click is felt. A slight tug will confirm that it is properly locked in place. Step 4: Once all contacts are in place, insert the wedgelock into the housing. DT Series Contact Removal Step 1: Remove the wedgelock using a DT-RT1 removal tool, a screwdriver, a hooked tool or a pair of needle nose pliers. Step 2: To remove the contacts, gently pull wire backwards, while at the same time releasing the locking finger by moving it away from the contact with a screwdriver. Step 3: Hold the rear seal in place, as removing the contact will displace the seal
Play Video
Play Video
00:50
Deutsch DRB Series Connectors Overview | Deutsch Connectors
The DRB Series connectors are heavy-duty connectors ideal for bulkhead applications. They are designed to accommodate multiple wire gauges and feature high pin counts, including 48, 60, 102, and 128 cavities. To increase the design flexibility, the DRB Series offers several mounting flange options and wire arrangements. The DRB series is perfectly suited to on and off-highway applications, marine, industrial, and agriculture markets in harsh environments. Product Link:- https://www.deutschconnectors.com.au/deutsch-connectors/deutsch-drb-series-connectors.html KEY FEATURES:- - Accepts contact sizes 4 (100 amps), 8 (60amps), 12 (25 amps), 16 (13 amps), and 20 (7.5 amps) -6-22 AWG -48, 60, 102, and 128 cavity arrangements -Flange mount -Rectangular, thermoplastic housing -Jackscrew for mating -Wedgelocks assure contact alignment and retention MATERIAL SPECIFICATIONS:- Flange Body: Thermoplastic Flange Clip: Steel Grommet: Silicone rubber Jackscrew: Steel Receptacle Threaded Inserts: Steel Shell: Thermoplastic Wedgelocks: Thermoplastic PERFORMANCE SPECIFICATIONS:- DEUTSCH electrical connectors will stand up to the harsh environmental challenges that are common to industrial markets that require advanced performance. Proper parts, procedures, and tooling must be used. TEMPERATURE Operating at temperatures from -55° C to +125° C continuous at rated current. DURABILITY No electrical or mechanical defects after 100 cycles of engagement and disengagement. VIBRATION No unlocking or unmating and exhibits no mechanical or physical damage after sinusoidal vibration levels of 20 G’s at 10 to 2000 Hz in each of the three mutually perpendicular planes. No electrical discontinuities are longer than 1 microsecond. PHYSICAL SHOCK No unlocking, unmating, or another unsatisfactory result during or after 50 G’s in each of three mutually perpendicular planes. No electrical discontinuities are longer than 1 microsecond. MIL-STD 202, Method 213, Condition “C”. FLUID RESISTANCE Connectors show no damage when exposed to most fluids used in industrial applications. INSULATION RESISTANCE 1000 megohms minimum at 25° C. MOISTURE RESISTANCE Properly wired and mated connections will withstand immersion under three feet of water without loss of electronic qualities or leakage. DIELECTRIC WITHSTANDING VOLTAGE Current leakage of fewer than 2 milliamps at 1500 VAC. THERMAL CYCLE No cracking, chipping, or leaking after 20 test cycles from -55° C to +125° C. Our Social Media Facebook:- https://www.facebook.com/deutsch.connectors/ Instagram:- https://www.instagram.com/deutsch_connectors/ Twitter:- https://twitter.com/deutschplugs All products are available online, supplied worldwide, and delivered to your door #deutsch #connector #drb
Play Video
Play Video
04:13
DEUTSCH DT Series Connector Instructions
This video provides step-by-step instructions on how to properly insert and remove contacts when using TE Connectivity's DEUTSCH DT Series Connectors. Visit http://www.laddinc.com for more information. DT Series Contact Insertion Step 1: Grasp crimped contact approximately one inch behind the contact barrel. Step 2: Hold connector with rear grommet facing you. Step 3: Push contact straight into connector grommet until a click is felt. A slight tug will confirm that it is properly locked in place. Step 4: Once all contacts are in place, insert the wedgelock into the housing. DT Series Contact Removal Step 1: Remove the wedgelock using a DT-RT1 removal tool, a screwdriver, a hooked tool or a pair of needle nose pliers. Step 2: To remove the contacts, gently pull wire backwards, while at the same time releasing the locking finger by moving it away from the contact with a screwdriver. Step 3: Hold the rear seal in place, as removing the contact will displace the seal.
Play Video
Play Video
07:40
Deutsch DT Series Connectors - Overview
A brief display on the range of Deutsch DT Connectors that we supply. Links to products: Deutsch DT Series 2 Pin Connector Kits - Green Band: https://www.deutschconnectors.com.au/deutsch-dt-series-2-pin-connector-kit.html - CAT Spec: https://www.deutschconnectors.com.au/deutsch-dt2-1-cat-2-way-dt-series-cat-spec-connector-kit-with-green-band-contacts.html - Shrink Boot Adapter Modification: https://www.deutschconnectors.com.au/deutsch-dt2-1-e008-2-way-connector-kit-with-shrink-boot-adapter-modification.html Deutsch DT Series 3 Pin Connector Kits - Green Band: https://www.deutschconnectors.com.au/deutsch-dt-series-3-pin-connector-kit.html - CAT Spec: https://www.deutschconnectors.com.au/deutsch-dt3-1-cat-3-way-dt-series-cat-spec-connector-kit-with-green-band-contacts.html - Shrink Boot Adapter Modification: https://www.deutschconnectors.com.au/deutsch-dt3-1-e008-3-way-connector-kit-with-shrink-boot-adapter-modification.html Deutsch DT Series 4 Pin Connector Kits - Green Band: https://www.deutschconnectors.com.au/deutsch-dt-series-4-pin-connector-kit.html - CAT Spec: https://www.deutschconnectors.com.au/deutsch-dt4-1-cat-4-way-dt-series-cat-spec-connector-kit-with-green-band-contacts.html - Shrink Boot Adapter Modification: https://www.deutschconnectors.com.au/deutsch-dt4-1-e008-4-way-connector-kit-with-shrink-boot-adapter-modification.html Deutsch DT Series 6 Pin Connector Kits - Green Band: https://www.deutschconnectors.com.au/deutsch-dt-series-6-pin-connector-kit.html - CAT Spec: https://www.deutschconnectors.com.au/deutsch-dt6-1-cat-6-way-dt-series-cat-spec-connector-kit-with-green-band-contacts.html - Shrink Boot Adapter Modification https://www.deutschconnectors.com.au/deutsch-dt6-1-e008-6-way-connector-kit-with-shrink-boot-adapter-modification.html Deutsch DT Series 8 Pin Connector Kits - Green Band: https://www.deutschconnectors.com.au/deutsch-dt-series-8-pin-connector-kit.html - CAT Spec: https://www.deutschconnectors.com.au/deutsch-dt8-1-cat-8-way-dt-series-cat-spec-connector-kit-with-green-band-contacts.html - Shrink Boot Adapter Modification: https://www.deutschconnectors.com.au/deutsch-dt8-1-e008-8-way-connector-kit-with-shrink-boot-adaptor-modification.html Deutsch DT Series 12 Pin Connector Kits - Green Band: https://www.deutschconnectors.com.au/deutsch-dt-series-12-pin-connector-kit.html - CAT Spec: https://www.deutschconnectors.com.au/deutsch-dt12-1-cat-12-way-dt-series-cat-spec-connector-kit-with-green-band-contacts.html - Shrink Boot Modification: https://www.deutschconnectors.com.au/deutsch-dt12-1-e008-12-way-connector-kit-with-shrink-boot-adapter-modification.html Our products are available online, supplied worldwide and delivered to your door.
Play Video
Play Video
01:31
Well Connected - DT Series Keyed Wedgelocks
This episode of Well Connected shows how DEUTSCH DT series keyed wedgelocks help prevent mismating. TE Connectivity's DEUTSCH DT series electrical connectors require secondary wedgelocks, which are sold separately. The wedgelocks help provide proper contact alignment within each connector. Secondary wedgelocks are assembled at the mating interface and click into place. For 2, 3, & 4 way DT series connectors, keyed wedgelocks are available to help prevent mismating. Visit https://laddinc.com/ for more information.
Play Video
Play Video
01:30
Well Connected - DT Series 12 Way Enhanced Key Mod
This episode of Well Connected shows the DT series B016 receptacle modification, which helps prevent mis-mating. The B016 is available for the DT 12 way connectors, DT13/15, and DTF13/15 PCB Series connectors. In addition to the four keying positions (A, B, C, or D) and color coding, the B016 enhancement gives the user both visual and tactile proof of correct mating, helping to eliminate mis-mating opportunities during assembly. Please note the P012 plug is the required mate for the B016 receptacle to make the enhancement effective. The DT P012 plugs provide enhanced front seal retention resulting in an ultra tight environmental seal. The enhanced seal retention keeps the seal in place during mating and unmating. The P012 modification requires an enhanced P012 wedgelock. The DEUTSCH P012 modification is available in 2, 3, 4, 6, 8, and 12 cavity arrangements. P012 plugs have a black connector body except for the 8 and 12 cavity arrangements, where the color is based on the key. Visit https://laddinc.com/ for more information.
Deustch, Series HD10
Play Video
Play Video
03:14
DEUTSCH HD10 Series Connector Instructions
This video provides step-by-step instructions on how to properly insert and remove contacts when using TE Connectivity's DEUTSCH HD10 Series Connectors. Visit http://www.laddinc.com for more information. HD10 Series Contact Insertion Step 1: Grasp the contact-wire assembly between the thumb and forefinger on the wire approximately one inch behind the contact crimp barrel. Step 2: Hold the connector with the rear grommet facing you. Step 3: Push the contact straight into the connector grommet until a positive stop is felt. The retaining fingers in the connector will snap behind the shoulder of the contact and lock it in place. A slight tug will confirm that it is properly sealed. HD10 Series Contact Removal Step 1: With the rear grommet facing you, snap the appropriate size plastic tool over the wire of the contact to be removed. Step 2: Slide the tool along the wire into the insert cavity until it engages the contact and resistance is felt. The contact retaining clip will be in the unlocked position. Step 3: Pull the contact-wire assembly out of the connector.
Play Video
Play Video
03:19
DEUTSCH HD10 Series Connector Instructions
This video provides step-by-step instructions on how to properly insert and remove contacts when using TE Connectivity's DEUTSCH HD10 Series Connectors. Visit http://www.te.com/ict for more information. HD10 Series Contact Insertion Step 1: Grasp the contact-wire assembly between the thumb and forefinger on the wire approximately one inch behind the contact crimp barrel. Step 2: Hold the connector with the rear grommet facing you. Step 3: Push the contact straight into the connector grommet until a positive stop is felt. The retaining fingers in the connector will snap behind the shoulder of the contact and lock it in place. A slight tug will confirm that it is properly sealed. HD10 Series Contact Removal Step 1: With the rear grommet facing you, snap the appropriate size plastic tool over the wire of the contact to be removed. Step 2: Slide the tool along the wire into the insert cavity until it engages the contact and resistance is felt. The contact retaining clip will be in the unlocked position. Step 3: Pull the contact-wire assembly out of the connector.
Deutsch, Contact Crimping
Play Video
Play Video
07:42
DEUTSCH Contact Crimping Instructions
This video provides step-by-step instructions on how to properly crimp TE Connectivity's DEUTSCH industrial contacts using hand tools. Crimping instructions for solid contacts, stamped and formed contacts, and Quick Connect Series contacts are given. A tutorial on how to tell if a crimp is acceptable or unacceptable is also provided. For solid contacts, the HDT-48-00 is shown. For stamped and formed contacts, the DTT-16-00 is shown. For Quick Connect Series contacts, the AF8-TH163 is shown. For more information, please visit http://www.laddinc.com
Deutsch, Mounting Clips
Play Video
Play Video
01:11
Well Connected – DEUTSCH Mounting Clips
This episode of Well Connected shows how TE Connectivity’s DEUTSCH mounting clips work. DEUTSCH mounting clips are available for DT, DTM, DTP and DTHD connectors. They provide a secure mount for the connectors under the hood of a vehicle, on a chassis, or on any application where mounting the connector is beneficial. Visit https://laddinc.com/ for more information.
Deustch, Series HDP
Play Video
Play Video
01:44
Well Connected - HDP20 Series Backshell Options
This episode of Well Connected describes the different DEUTSCH HDP20 Series backshell options. The L015/L024 threaded adapters and L017 ring adapter modifications are available for TE Connectivity's DEUTSCH HDP20 series connectors. These adapter modifications provide simple, low cost assembly solutions for applications that require a backshell or conduit. The adapters are designed to be used with the backshell of your choice. The L015 threaded adapter is available on size 24 shells in the HDP20 series. The L017 ring adapter ring adapter is available on size 24 or size 18 shells in the HDP20 series. The L024 wide threaded adapter wide threaded adapter is available on size 24 or size 18 shells in the HDP20 series. Visit https://laddinc.com/ for more information.
Play Video
Play Video
04:02
DEUTSCH HDP20 & HD30 Series Connector Instructions
This video provides step-by-step instructions on how to properly insert and remove contacts when using TE Connectivity's DEUTSCH HDP20 & HD30 Series Connectors. Visit http://www.te.com/ict for more information. HDP20 & HD30 Series Contact Insertion Step 1: Grasp contact approximately one inch behind the contact crimp barrel. Step 2: Hold the connector with the rear grommet facing you. Step 3: Push contact straight into connector grommet until a positive stop is felt. A slight tug will confirm that it is properly locked in place. HDP20 & HD30 Series Contact Removal Step 1: With the rear grommet facing you, snap appropriate size removal tool over the wire of contact to be removed. Step 2: Slide tool along into the insert cavity until it engages contact and resistance is felt. Step 3: Pull the contact-wire assembly out of connector.
Deutsch, Series DTP
Play Video
Play Video
05:02
Deutsch DTP Series Connectors
Deutsch DTP Series Connectors A brief look at the Deutsch DTP Series connector range and required components. All available online here: https://www.deutschconnectors.com.au/deutsch-connectors/deutsch-dtp-series-connectors.html Deutsch DTP Series 2 way plug and receptacle, wedge locks and contacts all in a neat "Grab Pack" available here: https://www.deutschconnectors.com.au/deutsch-dtp-series-2-pole-connector-kit.html Deutsch DTP Series 4 way plug and receptacle, wedge locks and contacts to suit, all in a neat "Grab Pack" are here: https://www.deutschconnectors.com.au/deutsch-dtp-series-4-pole-connector-kit.html
TE,Series AmpSeal
Play Video
Play Video
03:34
AMPSEAL Connector Instructions
How-to instruction video for TE Connectivity's AMPSEAL connectors. Visit http://www.te.com/ict for more information. Contact Insertion 1. Grasp crimped contact approximately one inch behind the contact barrel. 2. Check that the wedgelock of the plug assembly is in open position. Align the contact with the applicable cavity. 3. Insert the contact into the connector cavity until there is an audible or tactile click. A slight tug will verify the contact is locked in place. 4. After all the contacts have been inserted, close the wedgelock by simultaneously squeezing locking latches inward and pushing the wedgelock into the housing. Contact Removal: 1. Insert the tip of a screwdriver between the edge of the plug assembly housing and one corner of the wedgelock. 2. Gently pry the edge of the wedgelock until it is released from (but not completely removed) the housing. Repeat these steps for the opposite corner of the wedge.
Play Video
Play Video
02:38
AMPSEAL Contact Crimping Instructions
How-to instruction video for crimping TE Connectivity's AMPSEAL contacts. Visit http://www.te.com/ict for more information. Contact Crimping 1. Begin with a stripped wire. 2. Cycle the crimp tool to the open position. 3. Place the contact into the correct die nest. 4. Partially close the tool until the contact is held in place. 5. Insert the stripped wire into the contact. 6. Squeeze the handles closed until the ratchet releases. 7. The ratchet will only release when the tool is fully closed and the crimp is complete.
Basic of Crimp Quality
Play Video
Play Video
19:32
Crimp Theory Fundamentals: ADVANCED
Expand your knowledge of quality crimp production with additional information on creating proper crimp connections.
Play Video
Play Video
10:14
The Basics of Crimp Quality
Expand your knowledge of quality crimp production with TE's video on crimp theory. The module delivers a basic level of learning concepts for those wishing to better understand crimp theory in the wire harness industry. http://spr.ly/6056Gcycy TE Connectivity Ltd. (NYSE: TEL) is a $14 billion global technology and manufacturing leader creating a safer, sustainable, productive, and connected future. For more than 75 years, our connectivity and sensor solutions, proven in the harshest environments, have enabled advancements in transportation, industrial applications, medical technology, energy, data communications, and the home. With 80,000 employees, including more than 8,000 engineers, working alongside customers in approximately 140 countries, TE ensures that EVERY CONNECTION COUNTS. Learn more at http://spr.ly/6057GcycJ. Connect with TE Connectivity online: • Visit TE Connectivity’s website: http://spr.ly/6057GcycJ • Subscribe to TE Connectivity on YouTube: http://spr.ly/6058GcycK • Follow TE Connectivity on LinkedIn: http://spr.ly/6050GcycM • Follow TE Connectivity on Facebook: http://spr.ly/6051Gcyc3 • Follow TE Connectivity on Twitter: http://spr.ly/6052GcycO • Follow TE Connectivity on Instagram: http://spr.ly/6053GcycP
Resources
WeTransfer
Follow
LinkedIn
Facebook
Twitter
Legal
Terms of Service
Privacy Policy
bottom of page